Pi zza Oven Tutorial
Why a Wood-Fired Pizza Oven ?
Gathering around a fire with friends and sharing a pizza straight from the flames is superb—the smoky taste, the crispy crust, and a good glas of red wine. Whether it’s a quiet night at home or an evening with friends, it’s just good times.
Materials needed and DIY Instructions:
-
• Plywood + Wall Studs
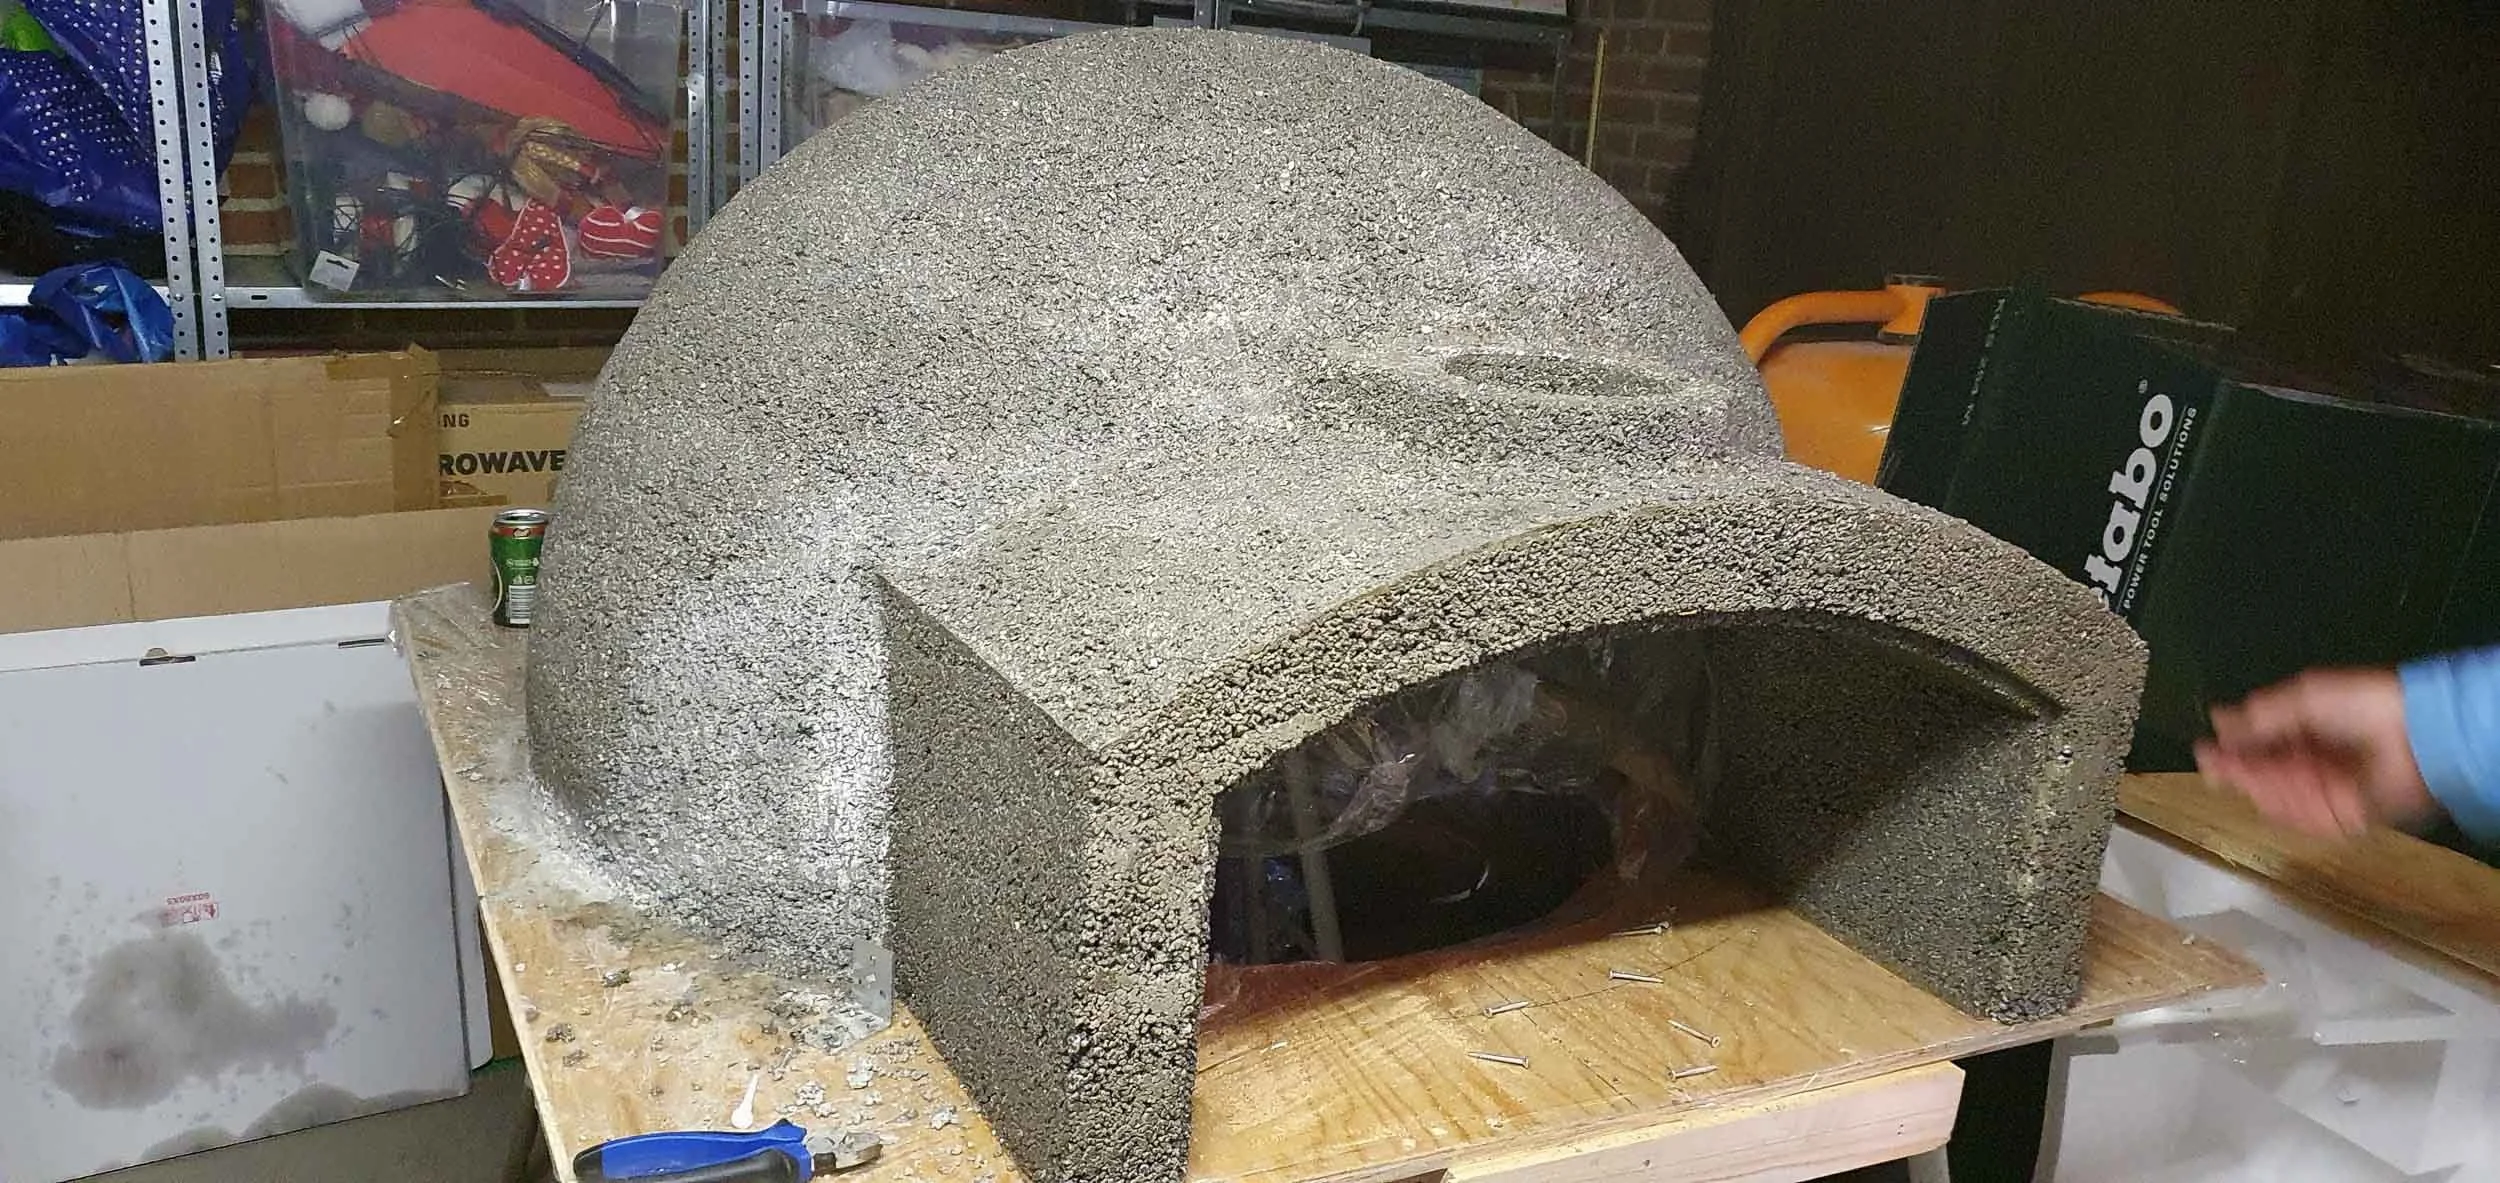
2 pcs – 1220x2440 mm and some wall studs, Use it to make a strong mould. Make sure the structure is stable and doesn’t bend. One Plywood is for the pizza dome, and the other is for the oven floor mould.• Plastic Pot + Gaffer tape
Used it to shape a round chimney hole. Mount it with tape. The diameter should be approximately ø130 mm. See pictures for reference.• Wall Studs + Bendable Plastic
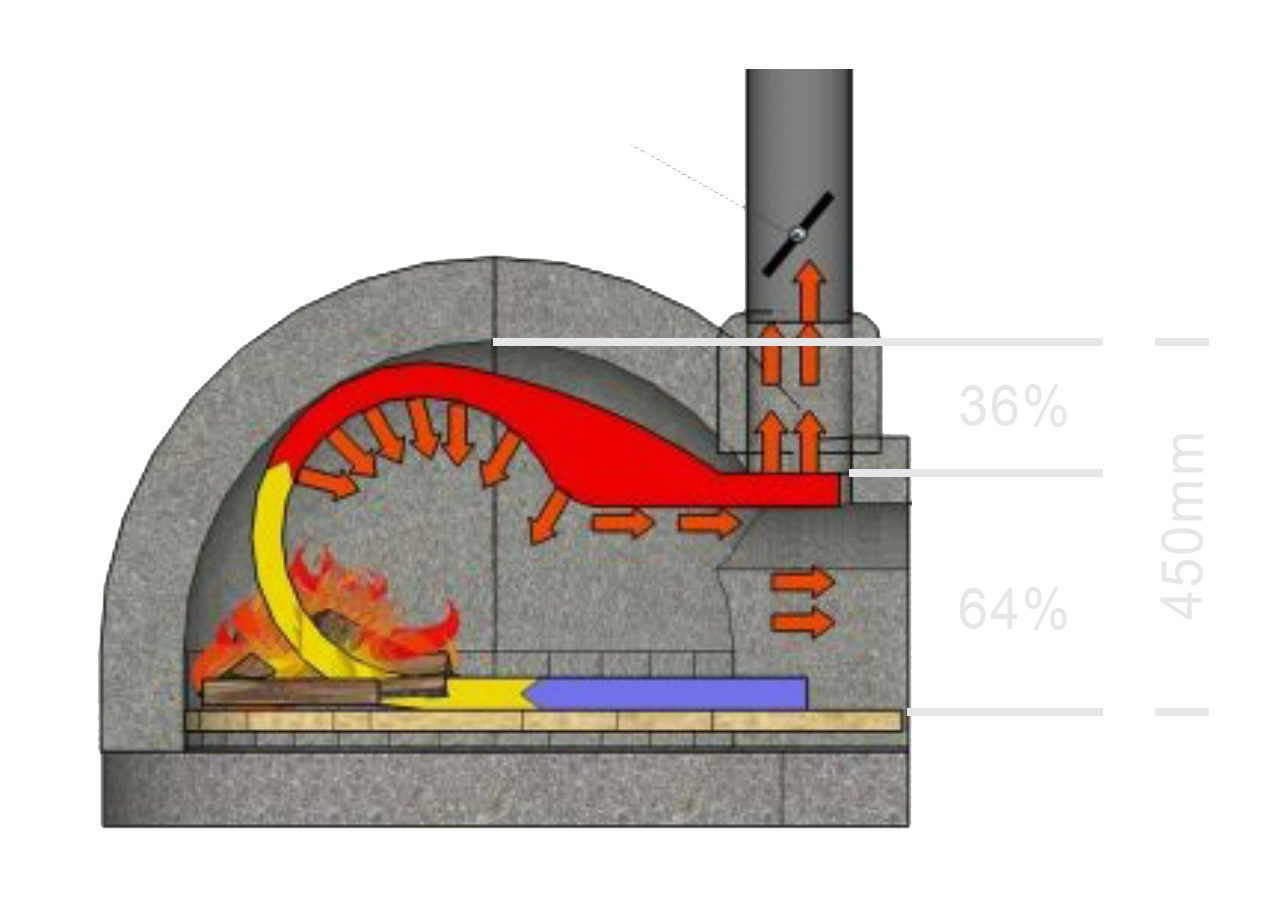
Used it to create the shape of the oven’s front opening. In the examples below, we built two different ovens with different front shapes using this method. But remember the 36% / 64% rule. Se the drawing. -
• Perlite + Portland Cement
Use a coarse grade perlite (5–6 bags) and 3 bags of Portland cement.
Mixing ratio: 4 parts Perlite to 1 part cement. Add water until the mix has the consistency of a soft snowball. Wall thickness: About 8 cm (roughly the thickness of a beer can).• Fire Bricks (35–40 pcs)
Used for the oven floor. Do not skip this! We tested ovens without them, and the result was less tasty and less crispy pizza. -
• Stone, Metal, or Wooden Base
Build a stable base or stand for your oven.
IMPORTANT: If using a wooden base, be sure to add proper fire protection.• Stove Pipe
Use a chimney stove pipe with a diameter of ø120 mm.• If something is missing
It´s just like Cooking, you need some equipment and Seasonings to be able to get a great results.
GREAT FRIEND - Enjoy the time making it together with a great friend. Remember that you need some empty beer cans to able measure the wall thikness. Thanks to Carl for helping with that.